
Hero had his 3rd birthday this week. He asked for a pig. I thought, "I can make a pig" so I spent hours the night before his birthday coming up with this cute little guy:
 I'll be honest, I was going for a round ball shape, but the late night and my less-than-stellar math skills resulted in the football shape. Oh well. I like it!
I documented a how-to for you:
You will need:
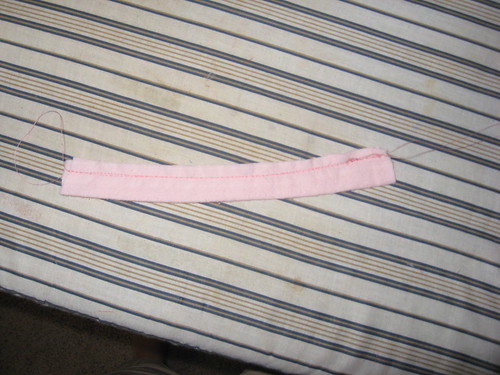
- 4 oblong shapes for the body 14" long and 4" wide at the center (scroll down to see pictures.)
- 4 squares 3" x 3" of main color for leg tops
- 4 pieces black 3" x 1 1/2" for feet
- 4 triangles 3 1/2" wide at bottom by 4" tall at center for ears
- 1 piece 2" x 8 1/2" for tail
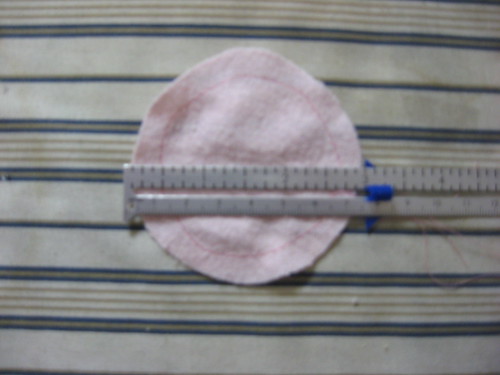
- 1 circle with 3" diameter for snout
- scraps of felt in white, black and blue
- stuffing
Start by making the tail. Fold in half the long way and sew on edge of pressure foot on the long side with regular stitch length. Trim thread, then sew again on same line with a long stitch leaving plenty of thread on ends.
 Attach a safety pin to the inside of one edge and turn. Fold one end over twice and sew down. Using thread left long on the other edge, pull on one thread to gather and curl the tail.
 Make sure you tie the two threads together in a good knot, or this may happen to you, too:
 (no worries, I fixed it)
Set the tail aside.
Next, make the legs. Sew the squares to the black pieces on edge of pressure foot.
Next, make the legs. Sew the squares to the black pieces on edge of pressure foot.
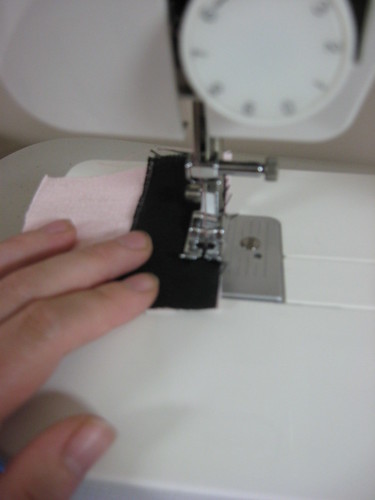 Press seam open.
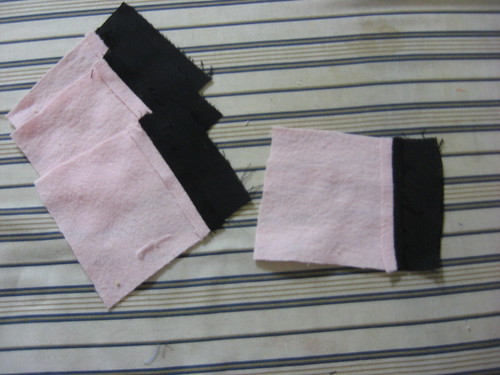 Fold in half, sew along black edge and up long side. Trim corners.
 Turn legs. Set aside. (No need to press, we will stuff them later.)
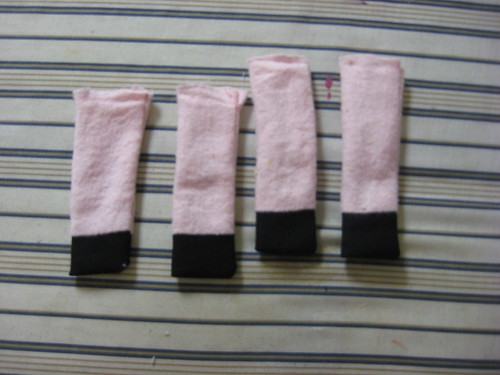 Make ears. Sew 2 triangles with right sides together on edge of pressure foot. Trim tip. Turn and press.
 Fold in half, sew on edge of pressure foot from center about halfway along bottom edge.
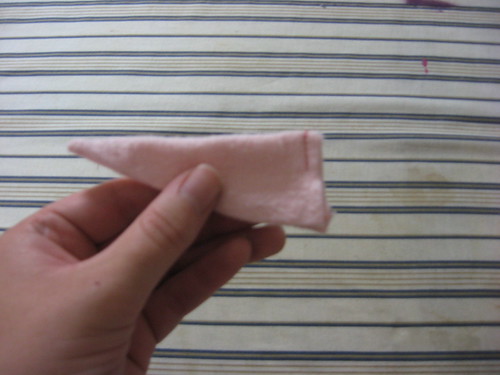 Press the fold to the side. Make sure to press fold opposite way for the second ear.
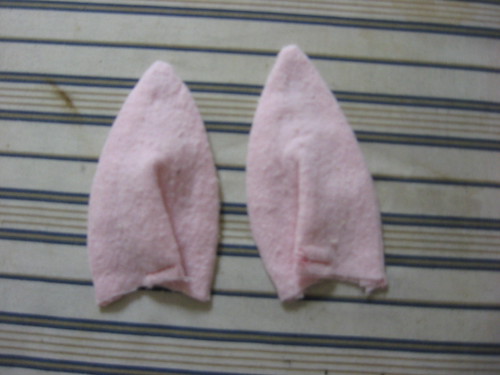 Stuff legs. Baste 2 legs and one ear to a main body piece. Place legs 2 1/2" apart in the center on one side, the ear lining up with one of the legs on the opposite side and the fold pointed toward the center.
 To do the other 2 legs and ear, mirror your first one, like so:
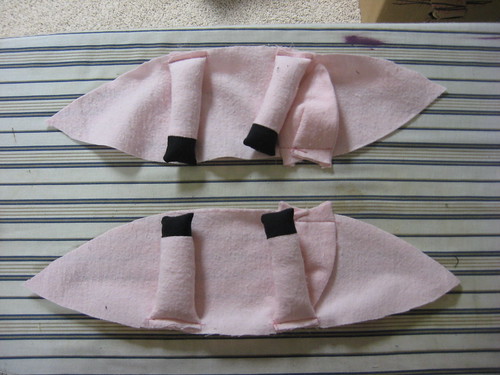 Once those are stitched on, lay them side by side like in the picture above, it will make it easier for the next step.
Lay the remaining body pieces on top and pin along the top edge of both. This means for one piece, you will stitch along the legs side, and the other along the ear side. Take a 1/2" seam width.
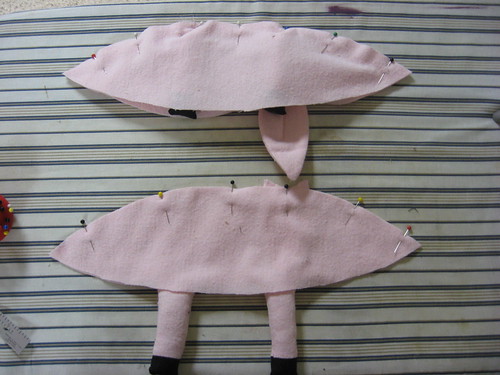
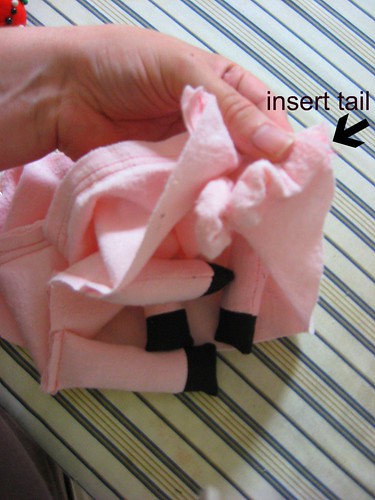
Next is putting the two sides together. It is important to make sure to line up the ears on the same end! Double check! You will also be putting in the tail on the opposite side of the legs than where the ears are. Make sure the tail is pointed toward the body, you will be sewing everything (legs, ears, tail) to the inside.
 Pin all the way around leaving 2" on either side of the center seam on the head end (ie. the end with the ears). I like to double pin on the mark so I don't sew too far. Sew taking a 1/2" seam. It should look like this when you're done:
Turn. I found it easiest to pull each leg out the hole first, then work the rest out. Stuff body.
Hand stitch hole closed.

Sew on edge of pressure foot around the snout circle with long stitch length.
Pull on thread to gather. Press flat.

Cut small circles from black felt to make nostrils. Hand stitch onto snout.
Then hand stitch snout to end of body.

Make eyes by cutting circles out of white and hand stitching blue onto white. Then hand stitch onto body.

And guess what?! You're done!!
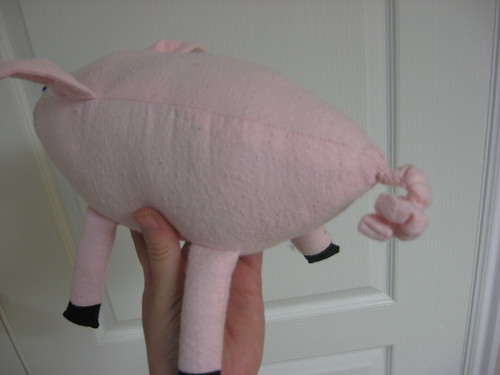
If propped patiently, it will stand up...

He likes it! But I think he might have been more excited about the balloons.
 Oink Oink.
3 comments:
Cute! I think I like the shape you ended up with better than if it had been more circular.
Just in case your wondering you kicked Martha Stewart's butt on this one. She has a pig tutorial on her website and it is a fail. It was semi traumatic trying to get it to look cute, but I think I might re-try it with your design.
Thanks
I'm so excited about this tutorial. My middle daughter, now a professional, wanted to change her name to piglet when she was about 7 and I have been looking for a perfect pig for her ever since. This is going to do it! Thanks
Post a Comment