Showing posts with label women clothing. Show all posts

4.28.2011

Bright Rust

About a month ago, I was getting ready for church. Normally, I'm a skirt and shirt kind of gal, but this day, I was in the mood for a dress. I opened the closet and realized. . . I have no dresses. Unless you count a traditional Chinese dress and my wedding dress (neither of which fit). I don't know how that happened. And I also don't know how I didn't know that I had no dresses.

Anyway, I bought a pattern and fabric and it turned out to be my first big project on my new machine. It is a stretch knit and the thread that matches perfectly was named "Bright Rust". I got to try out the "stretch stitch" on my machine; it looks like a lightning bolt and is totally awesome!

Simplicity 2369

I loved the whole experience of sewing it, and I'm in love with the new machine (I think she needs a name). This was supposed to be my Easter dress, but then Pretty was sick, so we didn't go to church. I only got to wear it for these pictures; but, hey, that was on Easter day so it counts.


Pretty's pleated masterpiece is almost completed and you will die, it turned out so cute!! I know I was supposed to have it done for Easter, but when Pretty was sick the day before, I knew it wasn't important to finish it that night. . . so I procrastinated again. It will be done today, I pinky swear!

10.12.2010

Socks to Arm Warmers

You probably recognize these socks. When I make sock monkeys I usually like when the heel (that becomes the mouth) is a different color than the rest of the sock to help make it stand out. That's why the third pair in this set didn't make the cut.


So I found a different use for them. I mean, sure, I could have used them as socks; but where is the fun in that? Look at my new arm warmers!


After I showed these to Jake he asked me if I could make thumb holes in a few of his sweatshirts. . . More things for the project list.

Well? Do you want to make some?

Supplies:
  • 1 pair socks
  • basic sewing supplies

First step is to cut the thumb opening. I cut from one heel shaping seam to the other.


Slip the sock on your hand and figure out where you want to cut it. Mine ended up being about 4 inches from the toe.


You can just snip a little on the side instead of measuring, just be careful not to cut yourself!

Now you need to cut 1 1/2 inches from the removed toe portion. This will be used to make the cuffs.


From the cuff piece, cut off 1/4 of the length. The small piece is for the thumb and the rest for the fingers cuff.

*EDIT* After making a second pair, I have realized that the 1/4 piece is just too small! So I suggest cutting a second strip from the toe portion of the sock (1 1/2 in wide), then cut that in half and use the half for your thumb cuff. This will make the thumb cuff easier to sew and more comfortable to wear. Still cut 1/4 off of the first piece and use the 3/4 portion for the fingers cuff.


The thumb cuff is the toughest part of the process only because it is so small. 

With right sides facing, pin one end of the cuff on the inside corner of the thumb opening (next to the fingers opening). Next, pin the center of the cuff to the other corner of the thumb opening. Stretch the thumb opening out and pin in between the pins already there. Finish by pinning the other end back around by the inside corner and placing a last pin in between. You should end up with 5 pins.


Now you need to sew with the edge lining up with the edge of the pressure foot. Stretch as you go to make it as smooth as you can. It seems intimidating, but just go for it and it's easier than it looks.


Turn the sock inside out and pin down the side of the thumb cuff and sew as far down as you need to close off the opening.

Once it's sewn, poke a finger through the opening and fold the cuff down in half.


By hand, slip stitch the fold down. Don't pull the stitches too tight because the opening needs to stretch a bit when you use it.


The hardest part is done! It may feel a bit snug, just stretch it out a bit and it will fit.


To make the fingers cuff, fold the longer piece in half width wise right sides facing and sew along the short edge.


Once sewn fold it in length-wise in the circle with the wrong sides facing, matching raw edges.


Pin the cuff on the right side of the sock matching all three raw edges and sew on the edge of pressure foot.


Tuck the seam in and you're done! Repeat on the second sock.


Now go show off your new arm warmers!

Pulled up:


Or pushed down!


This would be awesome in argyle. Oh the possibilities!

No costumes yet. Halloween sewing to commence tonight!!

8.11.2010

Tattered Chic Skirt

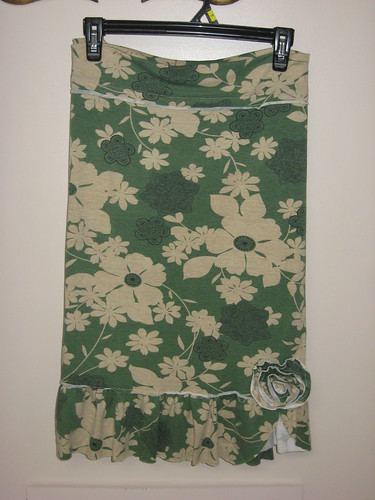
I made me a new skirt, without a pattern, though very much inspired by this denim skirt by Linda of at Craftaholics Anonymous. I even used the tutorial she had for the flower, with my own variation.

IMG_7527


I bought this material for my birthday back in April. I had plans to make a shirt out of it, but decided that it was too heavy. Then I thought and imagined and planned. I was scared to cut it out and ruin it because the material was kind of expensive (for me). But I finally just went for it!

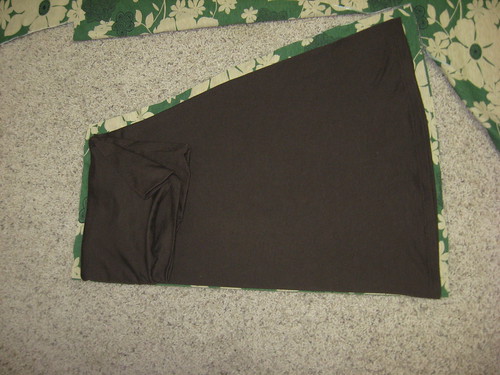
I laid down a stretch knit skirt I had. I cut an extra 1/2 on the sides for sewing. However, it ended up a bit loose. I learned that for stretch knit, you need to make it tighter, so if I do it again, I'm just going to cut right on the edge of the old skirt. I also ended up cutting off about 4 inches from the length so my ruffle wouldn't make the skirt too long.

IMG_7464


I also cut a 6 in wide band for the top, and 2 bands the entire width of the fabric that were 5 inches to make the ruffle on the bottom.

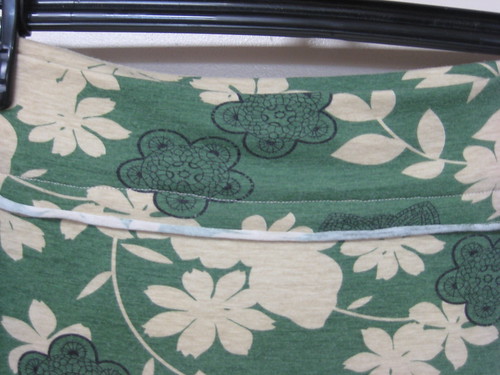
Since knit doesn't fray, I decided to do exposed seams so they would roll and add some design to the skirt. To show you how I did that, I'll explain the waist band. (I had already sewn the side seams of both skirt and waist band before I took pictures.)

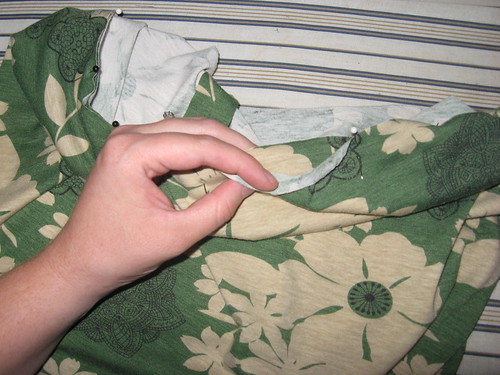
First, against your taught intuition, you need to pin the band to the inside of the skirt with the RIGHT side of the band facing the WRONG side of the skirt.

IMG_7481


It should look like this when sewn:

IMG_7485


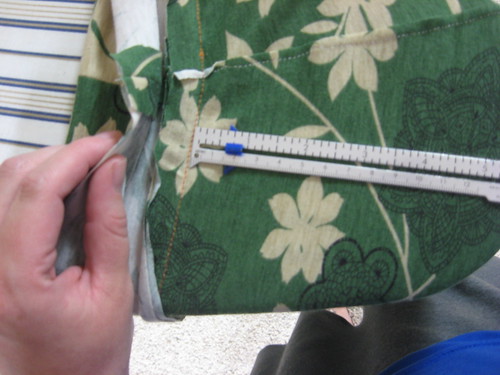
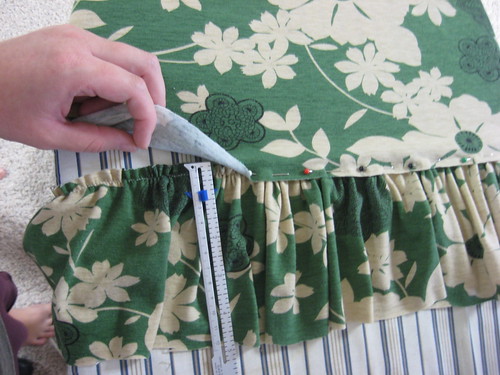
Then, use a seam gauge to make sure it's even, fold the waist band in half and pin with the edge of the waist band past the seam.

IMG_7487

Then sew the waist band down with the fabric lining up with the edge of the pressure foot. I also sewed a second line above it to hold down the now hidden seam.

IMG_7532


I attached the ruffle in the same manner. I measured about 5/8 of an inch, but after sewing, it left some of my gather stitch exposed, so I would recommend pinning about an inch, but still sewing with the fabric lined up on the edge of  the pressure foot.

IMG_7488


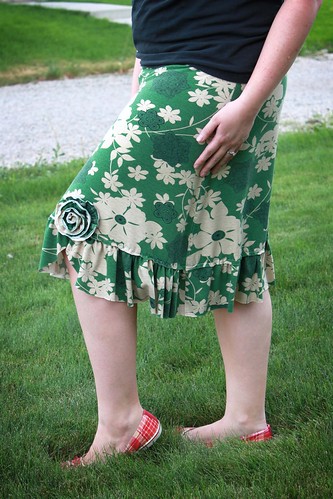
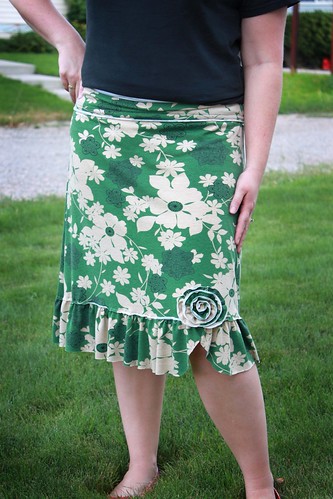
After sewing on the ruffle, I took my scissors and cut a line up the ruffle, then rounded the edges to create the slit/gap. I also added the spiral flower from Linda's tutorial, with one difference. I sewed the strip in half, like she said, but then gathered the folded edge to leave the raw edges exposed. That way the flower followed my theme of tattered chic.

IMG_7533


This skirt is super comfy and I love it!

vivian skirt 01


vivian skirt 03

ReCap of things I learned for next time:
  1. Cut stretch knit fabric smaller, it stretches...
  2. Take a bigger seam to hide gather stitch (plus it would probably help with the fit to do the same on the sides.)