Showing posts with label organize. Show all posts

8.23.2010

Jewelry Roll

Pretty and Laolao

My husband's grandmother came to visit from Texas for the last 2 weeks. Laolao (grandma) makes jewelry as a hobby. While she was here, she made me 2 sets of  matching earrings and bracelet. I wanted to make her a gift too. After I got that awesome package in the mail, I went through the calender and found a project for a "Jewelry Roll" that I thought it was perfect. Click here for the pattern online.

It was pretty simple, even though the instructions looked a bit complex. And it turned out super cute:


The orange thing in the center is for rings, secured with a snap:


And there are 2 pockets:


It went together quickly; but it would have taken about 30 min less if it weren't for the silly snap:


I've never done snaps you hammer in place before. First, I couldn't get it to work with the suggested spool buffer between the snap and the hammer; the spool smashed in and I ended up using a baby food jar's lid. Then, I ruined one top by not having the correct side facing the fabric so the prongs smashed, but didn't hold (plus I cracked and scratched the pearl top). Next, I ruined on bottom by smashing the point in. This time it was secure and I had to cut it out, repair the hole, and try again. I ended up using a larger snap piece from another pack to use as a protector for the one that ended up on the finished project. Anyone know an easier way of using these?

I also used my walking foot for the first time on this project, and let me tell you, WORTH EVERY PENNY (especially when you get it cheap on Amazon.com)! It was suggested in the pattern to use the walking foot to sew around the edge because you are working with so many layers at that point. I did, and it's excellent! It feeds so evenly that all I had to do was guide it. No shifting, no pulling and fixing. It just worked. Definitely recommend the walking foot!


Things I've learned:

1. Use baby food lid for applying snaps. Or perhaps go buy a kit for it...
2. Walking foot is the best thing ever!!. . . for now. . .

8.19.2010

Elastic Organizer Binder Tutorial

I promised to show you how I used the dyed elastic and here you go! I turned a regular binder into...


a portable elastic organizer:


Want to make one for yourself, or for your kid? This one went to my bro-in-law who is headed for college in a week!

What you need:

1. 3 ring binder
2. Elastic. I used 1" wide and 1/2" wide. (dyed if you wish)
3. Ribbon
4. Hot glue
5. Binder clips (not needed, but can help.)

Here we go!

First, cut 1 piece of elastic. For mine, I cut the 1" elastic 6 in long and the 1/2" elastic 6 1/2 in long. But before you cut a bunch of them, take the binder clip to hold one end, then stretch it around the inside of the binder. This will leave one hand free to test the stretch of the elastic, you want it to be tight enough to hold things without letting them slide out. I tested with a pack of cards.


Once you figure out what length you need for your elastic, cut as many as you will use


Next step is to lay the elastic out so you know where you will want it. Don't bother trying to weave it yet. This is just to get a feel for where they will be. Make sure to leave space for the binder rings so they won't hit when you close the binder.


Now you hot glue. Do the vertical ones first. Glue the top of each elastic on the outside of the binder, allow to dry for a few minutes to make sure it holds. Then stretch it down and glue the other end, also to the outside.


For the horizontal ones, start on the inside, gluing the edge to the edge where the binder folds.

it looks weaved, but you don't need to worry about that when doing this step.

Now is the fun part of weaving the elastic. You can weave it however you want, just try to leave some larger stretches as well as small ones. I used pins to hold them down to see what it would look like. You could also use the binder clips again.


After you've weaved it to your satisfaction, hot glue the other end on the outside. Your binder should now look like this:


Now to cover the edges. For the inside, I chose this inspirational printed twill tape. Just lay it over and hot glue it down.


Choosing how to cover the outside took some time. I considered covering with awesome material, or scrapbook paper. But this was made for an 18 year old boy. I had to make sure it wasn't girly-crafty. So I had to ask my husband... He helped me decide that the satin ribbon was the least girly of the options. If you are making it for a girl, you could do such pretty and cute things with this part!!

But here's how you do the ribbon. First, measure it against the edge, leaving a bit extra on either end. Fold it over and secure with a dab of hot glue.


Then hot glue over the elastic ends.


Even though there are no elastic edges to cover, I decided to put ribbon on the folded edge too, so it was symmetrical. And now your done!

Outside:


Inside:


Stuff with your stuff and take it to school!
Actual stuff of the bro-in-law. He was pretty excited about it! And claimed it was not too girly.

Enjoy!

8.08.2010

Elastic Organizer

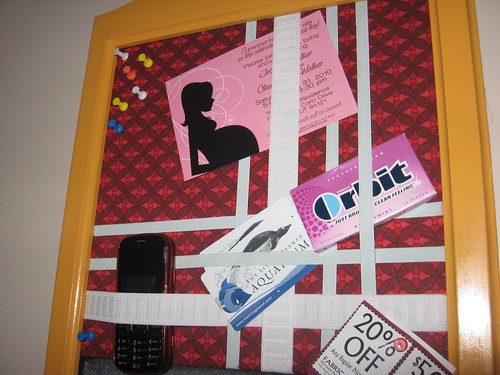
The voting for I'm Made For Competition at Made by Heidi is over and, sadly, my Elastic Organizer (titled "Fabric Corkboard/Chalkboard") was not chosen. Blast. Maybe next time. Good luck to all the ladies who made it in! I'm excited to see the projects they come up with over the next 5 weeks!

As for my project. I love it. And I hope, after seeing more of it, you will too. So, of course, I have more to share!

First, I found this totally awesome frame at a thrift store. I bought the 12x12 flexible cork board at WalMart. It was a 4 pack for $5. The material and elastic I had laying around.

IMG_7441


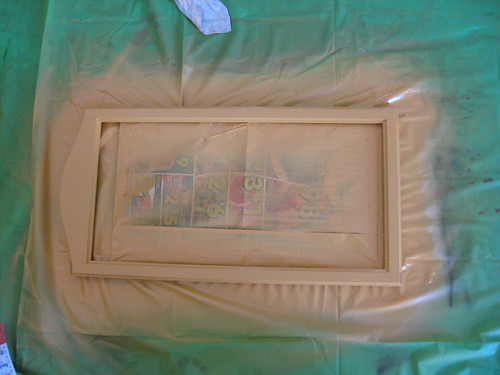
I spray painted for the first time in my life, and it was so much fun! I did the Chalkboard spray paint (found at WalMart) first, then put newspaper over it and sprayed the frame.

IMG_7448

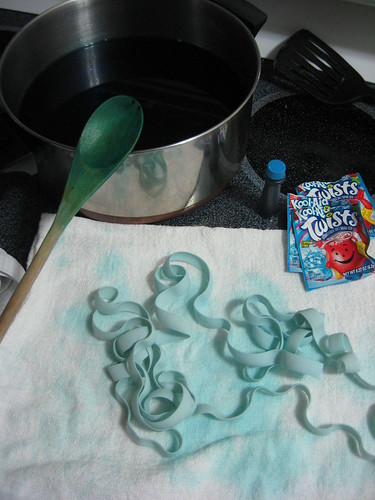
I dyed the smaller elastic with kool-aid. I just searched the internet for the how-to, and it said that the blue takes more to get a stronger color. But even with 3 packets and some extra food coloring thrown in, it was still not very dark. Sad.

IMG_7447


I used Heat-N-Bond to stick the fabric right onto the cork board. For the elastics I used hot glue to attach them. I had to stretch them pretty tight to make sure they would hold heavier items, and since it was the board was flexible I had to put a book on it to stop it from curling! (and I forgot to take a picture of that madness).

Next, I put the board into the frame and hot glued it down. Wahlah! All done!

IMG_7454


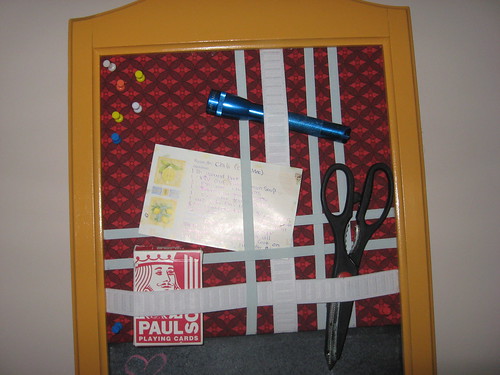
This piece can be useful in any room you decide to place it.

The kitchen:
IMG_7457


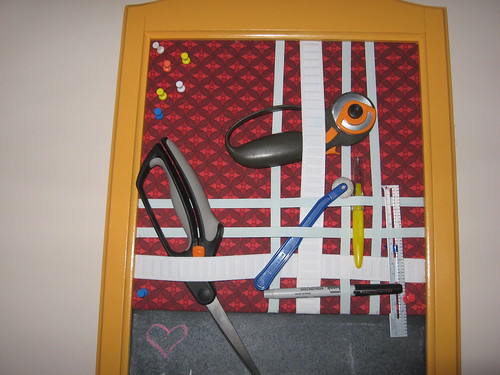
The craft room:
IMG_7456


I chose the entryway:
IMG_7453


I love it, and I hope you do too!
IMG_7452
Change the message to: "Make me, I'm awesome!"


I'll be doing a tutorial on dying the elastic with kool aid soon, as well as making a more portable version of the elastic organizer! Check back soon!