Remember when we were in elementary school and would trace our hands, color in the fingers and turn it into a turkey? I decided to make this classic into a more permanent decoration piece.
I love that it's a keepsake of my kids this year.
Here's how it's done.
Supplies:
- Wooden plaque
- Paint
- Rag
- Scraps of brown fabric and fall colors fabrics
- Mod Podge
- Sharpie
- Wood sealer
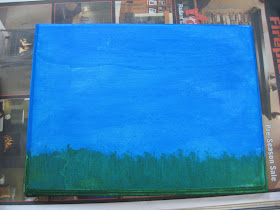
Instead of painting with a brush, I globbed paint on to the plaque, and rubbed it in with the rag.
This way, the grain is still visible.
I put the blue sky on first, the added green over top, using a new rag.
I traced my kids' hands onto paper and then cut them out.
 |
| you can see where I practiced the turkey on Pretty's hand :-) |
Fold over the fingers and cut the palm and thumb out of the brown fabric.
To cut out the fingers, I cut the fingers off the pattern one at a time (so I didn't mix them up!). Leave about 1/4" on the bottom when you cut it out.
Place the pieces on the plaque with the fingers under the palm.
Carefully pull the palm off, leaving the fingers in place.
Use a pencil to mark the place of the fingers.
Paint Mod Podge onto the back of the fingers and place them back one at a time. Then Mod Podge the palm and put it in place over the fingers.
Here's what you should have at this point.
Cut tiny triangles and use Mod Podge to secure them as the beak.
Use a Sharpie to draw in the feet.
Lastly, I went over the whole plaque with a thin layer of Mod Podge (it makes it a bit shiny), then wood sealer.
Gobble! Gobble!


Aww, that is is cute! I love the two turkeys together. Thanks so much, I'll be linking.
ReplyDelete