You probably recognize these socks. When I make sock monkeys I usually like when the heel (that becomes the mouth) is a different color than the rest of the sock to help make it stand out. That's why the third pair in this set didn't make the cut.
So I found a different use for them. I mean, sure, I could have used them as socks; but where is the fun in that? Look at my new arm warmers!
After I showed these to Jake he asked me if I could make thumb holes in a few of his sweatshirts. . . More things for the project list.
Well? Do you want to make some?
Supplies:
- 1 pair socks
- basic sewing supplies
First step is to cut the thumb opening. I cut from one heel shaping seam to the other.
Slip the sock on your hand and figure out where you want to cut it. Mine ended up being about 4 inches from the toe.
You can just snip a little on the side instead of measuring, just be careful not to cut yourself!
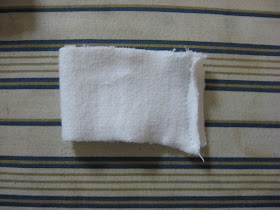
Now you need to cut 1 1/2 inches from the removed toe portion. This will be used to make the cuffs.
From the cuff piece, cut off 1/4 of the length. The small piece is for the thumb and the rest for the fingers cuff.
*EDIT* After making a second pair, I have realized that the 1/4 piece is just too small! So I suggest cutting a second strip from the toe portion of the sock (1 1/2 in wide), then cut that in half and use the half for your thumb cuff. This will make the thumb cuff easier to sew and more comfortable to wear. Still cut 1/4 off of the first piece and use the 3/4 portion for the fingers cuff.
The thumb cuff is the toughest part of the process only because it is so small.
With right sides facing, pin one end of the cuff on the inside corner of the thumb opening (next to the fingers opening). Next, pin the center of the cuff to the other corner of the thumb opening. Stretch the thumb opening out and pin in between the pins already there. Finish by pinning the other end back around by the inside corner and placing a last pin in between. You should end up with 5 pins.
Now you need to sew with the edge lining up with the edge of the pressure foot. Stretch as you go to make it as smooth as you can. It seems intimidating, but just go for it and it's easier than it looks.
Turn the sock inside out and pin down the side of the thumb cuff and sew as far down as you need to close off the opening.
Once it's sewn, poke a finger through the opening and fold the cuff down in half.
By hand, slip stitch the fold down. Don't pull the stitches too tight because the opening needs to stretch a bit when you use it.
The hardest part is done! It may feel a bit snug, just stretch it out a bit and it will fit.
To make the fingers cuff, fold the longer piece in half width wise right sides facing and sew along the short edge.
Once sewn fold it in length-wise in the circle with the wrong sides facing, matching raw edges.
Pin the cuff on the right side of the sock matching all three raw edges and sew on the edge of pressure foot.
Tuck the seam in and you're done! Repeat on the second sock.
Now go show off your new arm warmers!
Pulled up:
Or pushed down!
This would be awesome in argyle. Oh the possibilities!
No costumes yet. Halloween sewing to commence tonight!!


Seriously cool! Just found you-can't remember where. Love your stuff & can't wait to read more!
ReplyDeleteI love those! They are right up my alley.
ReplyDeleteI loved your idea! They look great!
ReplyDeleteThose are super cute and I love the thumb! Thanks so much, I'll be linking.
ReplyDeleteLove this! How come no one thought of this before - well before you Vivian :D
ReplyDeleteGreat tutorial! I was just thinking about buying fingerless gloves/arm warmers, but now I can make them *yay* Thanks!
Thanks for another great tutorial! You are such a smarty. I have also added this project to What Can You Make with a Pair of Socks Round Up. If you would rather I delete your project from this round up please let me know.
ReplyDeleteThanks and have a fabulous Day!
Great idea for fall runners on a budget! Thanks!
ReplyDelete